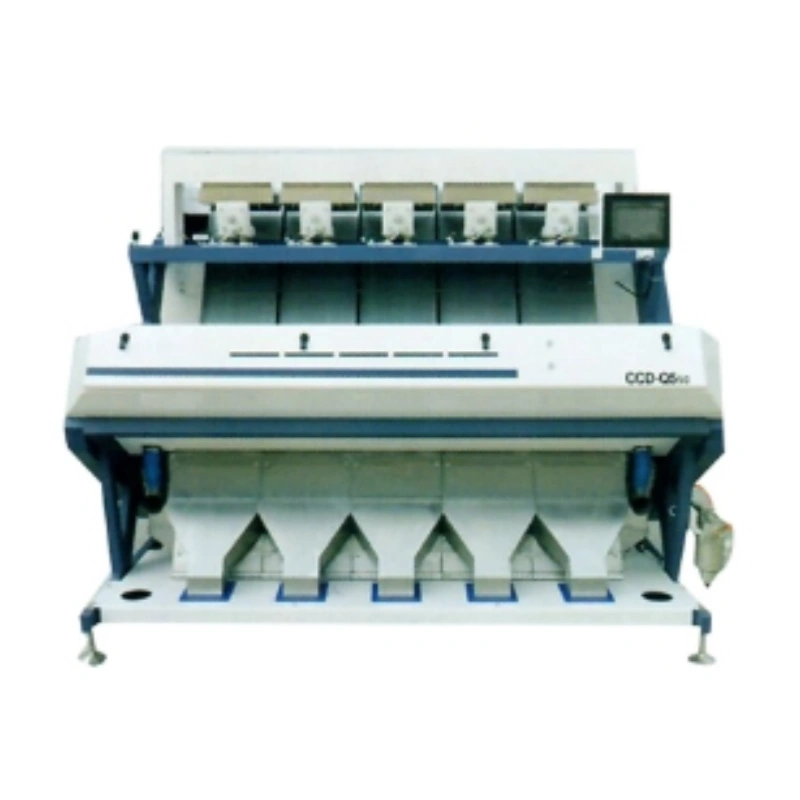
Maintaining optimal accuracy in your color sorter machine requires precise calibration—a critical process that ensures consistent, high-quality sorting results. Whether you're processing agricultural products, recyclable materials, or industrial components, proper calibration directly impacts efficiency, waste reduction, and profitability. Without it, even the most advanced sorting machines can misclassify materials, leading to increased defects, lower yields, and higher operational costs.
The impact of improper calibration can be significant. In food processing, for example, poorly calibrated sorters may allow discolored or contaminated grains to pass through, compromising product quality and safety. In plastic recycling, inaccurate sorting can result in mixed polymer batches, reducing the value of recycled materials. Additionally, frequent machine errors due to poor calibration lead to unnecessary downtime, wasted energy, and higher maintenance expenses. These inefficiencies ultimately affect your bottom line, making regular calibration essential for maximizing return on investment.
The calibration process involves adjusting the machine’s optical sensors, setting appropriate color thresholds, and fine-tuning sensitivity to match the specific material being sorted. Modern color sorter machines often feature advanced technologies like AI-driven image processing and real-time feedback systems, which help maintain precision over time. However, even with these innovations, manual calibration checks remain necessary to account for environmental factors such as lighting changes, dust accumulation, or wear on critical components.
This guide provides a detailed, step-by-step approach to calibrating your color sorter machine for optimal accuracy. From initial setup and sensor adjustments to performance validation and troubleshooting, you’ll learn industry-proven techniques to enhance sorting efficiency. Whether you’re a technician performing routine maintenance or an operator looking to improve output quality, mastering calibration ensures your machine operates at peak performance—reducing waste, increasing yield, and maintaining consistent product standards.
By following these best practices, you can extend the lifespan of your equipment, minimize costly errors, and achieve the highest possible sorting precision for your specific application. Let’s dive into the key steps for effective calibration and long-term machine reliability.
Pre-Calibration Checklist
Before beginning the calibration process for your color sorter machine, a thorough pre-calibration inspection is essential to ensure optimal performance. This comprehensive checklist covers all critical aspects that could affect sorting accuracy and should be completed before any adjustment procedures.
1. Machine Cleaning and Debris Removal
A clean machine is fundamental for accurate color sorting. Begin by powering down the equipment and conducting a complete visual inspection. Remove all residual materials from the feeding hopper, vibration chute, and collection bins using approved cleaning tools. Pay special attention to the optical sorting area, where even minor dust accumulation can significantly impact performance. For food-grade applications, use food-safe cleaning solutions that won't leave residues. Industrial applications may require compressed air or specialized vacuum systems for thorough cleaning. Don't overlook mechanical components like belts and rollers, as built-up debris can affect material flow and sorting consistency.
2. Lighting Condition Verification
Proper lighting is the cornerstone of accurate color detection. Inspect all LED illumination units for consistent brightness and color temperature. Replace any flickering or dimming lights immediately, as inconsistent lighting leads to sorting errors. Measure ambient light levels around the machine - excessive environmental light can interfere with the optical system's performance. Consider installing light shields or enclosures if the machine operates in areas with variable lighting conditions. For machines with multiple light sources, verify that all units are properly synchronized and aligned to provide uniform illumination across the entire viewing area.
3. Sensor and Camera Inspection
The optical system requires meticulous attention. Carefully examine all lenses and camera windows for scratches, condensation, or dust accumulation. Use manufacturer-approved cleaning materials to remove any obstructions without damaging sensitive optical coatings. Verify that all cameras and sensors are securely mounted and properly aligned according to factory specifications. Check for any physical damage to wiring or connectors that could affect signal transmission. For multi-spectral systems, confirm that all wavelength-specific filters are clean and correctly positioned. Perform a preliminary test to ensure all cameras are capturing clear, focused images without distortion or artifacts.
4. Software and Firmware Updates
Outdated software can lead to calibration inconsistencies. Access the machine's control interface and verify the current software version against the manufacturer's latest release. Review the update log for any calibration-related improvements or bug fixes. Before updating, back up all existing settings and parameters. For networked machines, ensure stable internet connectivity during the update process. After installation, verify that all calibration presets and material profiles remain intact. Check that all connected peripherals (touchscreens, HMI panels, etc.) are running compatible software versions. Review and reset any adaptive learning algorithms that may have developed biases from previous sorting sessions.
5. Additional Pre-Calibration Considerations
Verify proper air supply and pressure for pneumatic ejection systems
Check vibration settings and mechanical alignment of sorting channels
Confirm proper operation of all safety interlocks and emergency stops
Validate temperature and humidity levels within operational specifications
Ensure adequate supply of calibration samples that represent current production materials
By meticulously completing this pre-calibration checklist, you establish the ideal conditions for achieving precise calibration results. This proactive approach minimizes variables that could affect sorting accuracy and ensures your subsequent calibration efforts yield consistent, reliable performance. Remember that different materials and applications may require additional specific checks - always consult your machine's operation manual for application-specific pre-calibration requirements.
Step-by-Step Calibration Process
A. Machine Setup & Baseline Test
Begin by powering on the color sorter and allowing a 15-20 minute warm-up period for optimal system stability. During this time, the illumination system reaches consistent brightness levels and electronic components stabilize at operating temperatures. While warming up, prepare a representative sample of your material - ideally 5-10kg of product that includes both acceptable and defective items. Load the sample into the feeding system and run an initial test batch at normal operating speed. Carefully observe and document the machine's performance, noting any obvious sorting errors, ejection timing issues, or inconsistent behavior. This baseline test provides crucial reference data for subsequent adjustments.
B. Adjusting Sensor Sensitivity
Access the sensitivity settings through the machine's control interface, typically found in the "Advanced Settings" or "Calibration" menu. For hardware adjustments, consult your manual for specific potentiometer locations or dip switch configurations. Start with moderate sensitivity (usually 60-70% of maximum) and gradually increase while monitoring performance. Different materials require unique approaches: grains need higher sensitivity for subtle color variations, plastics benefit from balanced settings to avoid false rejects, while minerals often require maximum sensitivity for precise ore separation. Make incremental changes (5-10% at a time) and retest between adjustments.
C. Setting Color Thresholds
The threshold setting process begins with loading 20-30 samples of both good and defective items. Use the machine's "Learn" function to capture reference values for acceptable color ranges. For defect definition, manually feed known bad samples and adjust rejection thresholds until the system consistently identifies them. Most modern sorters allow creating multiple threshold profiles for different defect types (discoloration, spots, foreign material). Pay special attention to "gray zone" items that barely meet specifications - these determine your quality cutoff point. Save multiple profile versions to compare effectiveness.
D. Testing & Validation
Conduct at least three consecutive test runs with fresh samples to verify consistency. Measure accuracy by manually inspecting sorted batches and calculating the percentage of correctly identified items (both accepted and rejected). Aim for >98% accuracy in controlled test conditions. For statistical validity, each test batch should contain minimum 100-200 items. Document all settings and results for future reference. The iterative process continues until achieving stable, repeatable performance - typically requiring 3-5 adjustment cycles. Final validation should include a 30-minute continuous run under production conditions to confirm stability.
Remember to save all calibrated settings with descriptive names (e.g., "LongGrainRice_Summer2025") and note any environmental conditions (lighting, temperature) that might affect performance. This comprehensive approach ensures reliable sorting accuracy across production runs.
Advanced Calibration Tips
For optimal performance, leverage AI-assisted calibration if your system supports it - these smart algorithms automatically optimize settings based on real-time material analysis. Always account for environmental factors: adjust for high humidity that may affect optical clarity, and implement dust mitigation measures for consistent sorting. When calibrating for multi-color applications, create separate profiles for each target color and establish clear transition thresholds between color grades. Implement periodic auto-calibration checks during continuous operation to maintain precision. For challenging materials, combine multiple detection modes (color + shape + texture) to improve accuracy. Always document environmental conditions and corresponding calibration settings for future reference.
Common Calibration Mistakes to Avoid
Neglecting Minor Sensor Misalignments – Even slight deviations in camera or sensor positioning can significantly impact sorting accuracy. Regularly check and realign optical components to maintain precision.
Ignoring Wear and Tear on Key Components – Worn-out LED lights, dirty lenses, or degraded belts can reduce performance. Replace aging parts promptly to ensure consistent results.
Skipping Post-Calibration Testing – Failing to validate adjustments with multiple test batches may leave undetected errors. Always verify calibration with fresh samples before full production.
Using Non-Representative Samples for Calibration – If test materials don’t match actual production quality, the settings won’t be accurate. Ensure samples reflect real-world conditions.
Overlooking Environmental Factors – Changes in lighting, humidity, or temperature can affect sorting. Monitor conditions and recalibrate as needed.
Relying Solely on Default Settings – Every material and production line is unique. Avoid depending on factory presets—fine-tune for your specific application.
By avoiding these mistakes, you ensure long-term accuracy and efficiency in your color sorting operations.
Maintenance for Consistent Accuracy
To ensure long-term precision in your color sorter machine, implement a structured maintenance routine. Daily checks should include quick sensitivity tests using control samples and visual inspections of ejection mechanisms. Weekly maintenance requires more thorough verification of optical alignment, lighting consistency, and mechanical components.
Recalibration becomes essential after any mechanical maintenance, product changeover, or when environmental conditions shift significantly. Seasonal variations in material characteristics (like crop moisture content) may also necessitate recalibration. Always recalibrate after replacing critical components such as cameras, lenses, or light sources.
For cleaning and part replacement, follow these guidelines:
LEDs/Lighting: Clean weekly with alcohol wipes; replace if intensity drops below 80% of original output
Optical Lenses: Use microfiber cloths daily; inspect for scratches monthly
Belts/Conveyors: Check tension weekly; replace if worn or cracked
Air Ejectors: Clean nozzles daily; test pressure consistency weekly
Maintain a calibration logbook documenting all adjustments, part replacements, and performance metrics. This historical data helps identify patterns and predict when maintenance will be needed. For optimal results, combine scheduled maintenance with condition-based monitoring – modern sorters with IoT capabilities can alert you when parameters drift beyond acceptable tolerances.
Proper maintenance not only sustains accuracy but also extends equipment lifespan, reducing total cost of ownership while maintaining peak sorting performance.
Troubleshooting Calibration Issues
Blurry Camera Images
Primary Cause: Dust, condensation, or scratches on optical lenses
Solution:
• Power down and gently clean lenses with an approved optical cleaning kit
• Check for moisture buildup in camera housings
• Replace scratched or damaged lenses immediately
• Verify camera focus settings in software interfaceInconsistent Sorting Performance
Primary Causes: Lighting fluctuations or sensor misalignment
Solution:
• Measure light intensity with a lux meter (should be uniform across viewing area)
• Re-align sensors using manufacturer's calibration targets
• Check for vibrating/moving components affecting stability
• Test with different material batches to rule out product variationSoftware/System Errors
Primary Causes: Corrupted settings or firmware bugs
Solution:
• Export and save current configuration before resetting
• Perform factory reset through maintenance menu
• Update to latest firmware version
• Rebuild color profiles from scratch after resetAdditional Common Issues:
False Ejections: Adjust sensitivity in 5% increments; verify air pressure
Missed Defects: Increase contrast settings; check LED brightness
Machine Drift: Implement scheduled recalibration every 4-8 hours of operation
For persistent issues:
• Create a diagnostic video of the problem for technical support
• Capture system logs before restarting equipment
• Keep samples that demonstrate the sorting errors for analysis
Pro Tip: Maintain a "troubleshooting kit" containing spare lenses, calibration samples, light meter, and alignment tools near the sorter for quick adjustments. Document all troubleshooting actions and their outcomes to build an institutional knowledge base.
Note: Always consult your machine's specific manual for brand/model-specific troubleshooting procedures, as solutions may vary between manufacturers.
Conclusion: Maximize Your Color Sorter's Performance
Proper calibration is the cornerstone of maintaining peak efficiency in your color sorting operations. As we've demonstrated, precise calibration directly impacts sorting accuracy, product quality, and operational costs. Regular calibration ensures your machine consistently delivers optimal performance, minimizing waste while maximizing yield and profitability.
For long-term return on investment, we recommend establishing a scheduled calibration routine tailored to your specific production needs. Whether processing agricultural products, recyclables, or industrial materials, maintaining properly calibrated equipment protects your bottom line and safeguards product consistency.
As professional manufacturers and suppliers of high-quality color sorter machines, our team offers:
Expert calibration services
Genuine replacement parts
Technical support and training
Customized sorting solutions
Contact us at sarah@kingrunda.com to:
✓ Schedule professional calibration service
✓ Upgrade to our latest sorting technology
✓ Request a free consultation
Let our expertise help you achieve perfect sorting results - because when your color sorter performs at its best, so does your entire operation. Visit https://www.beanpeelingmachine.com/ or call +86-18854293852 to discover how we can optimize your sorting processes.
Precision sorting begins with proper calibration - trust the professionals to keep your operation running smoothly.
